
The Ultimate Python Set Up: Pyenv + Poetry
Operate your Python projects with ease.

The installation commands can also be found here.
While I love Python, one thing annoys me - There is no consensus on how to set up your Python environment on your machine. This leads to more and more tools aiming to tackle this problem.

In this post, I present you my solution, which helped me in 99 % of my Python projects: Pyenv + Poetry.
What is Pyenv? Why do I need it?
Suppose we have the following problem:
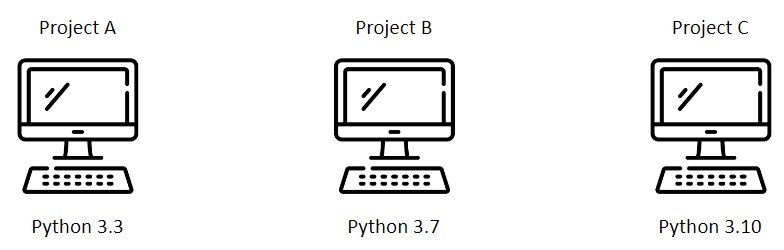
We have three different Python projects locally, each of them demanding a different Python version:
Now, what would you do?
One naive solution I did in my early Python days:
Go to the official Python website
Install Python 3.3 to work with Project A
Now, if I want to work with Project B, I install Python 3.7 from the official website
Change the PATH variable
If I switch back to Project A, I change the PATH variable again
You see, this is error-prone and annoying.
The solution: Pyenv.
Pyenv is a Python version management tool which lets you install and switch between Python Versions easily.
Pyenv also follows the UNIX rule of doing one thing and doing it well.
Set Up and Usage
Let’s see how we can set it up and use it.
Open up your terminal and install Pyenv.
On Mac/Linux/WSL2:
$ curl https://pyenv.run | bash

$ echo 'export PYENV_ROOT="$HOME/.pyenv"' >> ~/.bashrc
$ echo 'command -v pyenv >/dev/null || export PATH="$PYENV_ROOT/bin:$PATH"' >> ~/.bashrc
$ echo 'eval "$(pyenv init -)"' >> ~/.bashrc
The three commands below are for defining the location where Pyenv stores its data, adding the Pyenv executable to PATH, and installing Pyenv into your shell as a shell function.
On Windows (open Powershell with Admin rights):
$ Invoke-WebRequest -UseBasicParsing -Uri "https://raw.githubusercontent.com/pyenv-win/pyenv-win/master/pyenv-win/install-pyenv-win.ps1" -OutFile "./install-pyenv-win.ps1"; &"./install-pyenv-win.ps1"Verify your installation:
$ pyenv -v
pyenv 2.3.32
Perfect, now let’s install a few Python versions
$ pyenv install 3.7

$ pyenv install 3.10
To set a global Python version, run
$ pyenv global 3.7Let’s create a new folder named testproject which will serve as our project directory.
We want our project to use Python 3.10.
Let’s navigate into our directory and set the local Python version:
/testproject $ pyenv local 3.10This will create a .python-version file with the following content
#.python-version

3.10
This will tell Pyenv to use Python 3.10 in this directory.
That’s it. Python Version Management doesn’t have to be complicated.
What is Poetry? Why do I need it?
Imagine, we still have our three projects, and every project needs a different Pandas version.
What are you doing now?
My naive solution would be (everything with pip):
Install a specific Pandas version
If I have to switch between projects, I will deinstall it and install the new Pandas version
Rinse and repeat
Like with the different Python versions, this is error-prone and unreliable.
Another issue with de-installing libraries arises since pip will only remove the specified library but not its sub-dependencies. This will likely result in dependency issues which pip doesn’t resolve for you.
The solution: Poetry.
Poetry is a dependency manager on steroids, making adding/removing libraries a breeze.
It solves dependency issues automatically and removes unused sub-dependencies.
Poetry even lets you publish your package to PyPI with a few commands (not scope of this post).
Set Up and Usage
Let’s install Poetry.
On Mac/Linux/WSL2:
$ curl -sSL https://install.python-poetry.org | python3 - On Windows (open Powershell with Admin rights):
$ (Invoke-WebRequest -Uri https://install.python-poetry.org -UseBasicParsing).Content | py -To set up our Poetry project, let’s navigate into our newly created directory testproject and run:
$ cd testproject

/testproject $ poetry init
This will create a pyproject.toml file, the file Poetry uses to keep track of all the information around your project: Generell project information (author, version, etc.), Python version, dependencies, configuration for other development tools like pytest or ruff, etc..
Ours should look like this:
# pyproject.toml

[tool.poetry]
name = "testproject"
version = "0.1.0"
description = ""
authors = ["baniasbaabe <myemail@outlook.com>"]
readme = "README.md"

[tool.poetry.dependencies]
python = "^3.10"


[build-system]
requires = ["poetry-core"]
build-backend = "poetry.core.masonry.api"
It automatically detected the Python version we specified for our project with Pyenv :)
Now, adding dependencies is as easy as that:
/testproject $ poetry add numpyPoetry installs the library and automatically updates our pyproject.toml file:
# pyproject.toml

[tool.poetry]
name = "testproject"
version = "0.1.0"
description = ""
authors = ["baniasbaabe <banias@hotmail.de>"]
readme = "README.md"

[tool.poetry.dependencies]
python = "^3.10"
numpy = "^1.26.4"


[build-system]
requires = ["poetry-core"]
build-backend = "poetry.core.masonry.api"
Poetry will also create a poetry.lock file. This file records all dependencies and sub-dependencies with their specific version and hash of the source files. poetry.lock makes the reproducibility of your environment easier.
Removing dependencies is also simple:
/testproject $ poetry remove numpyOne cool feature is creating dependency groups. This lets you organize your dependencies. For example, you want to install libraries in your development environment (like pytest), but not in your production environment.
To install pytest and add it to the test group, run:
/testproject $ poetry add pytest --group testOur pyproject.toml will be updated:
...

[tool.poetry.group.test.dependencies.]
pytest = "^8.0.0"

...
Imagine, we want to set up the environment on a production and development environment. We want to install all the libraries for the development environment but not for the production one.
We can run
$ poetry installfor the development environment since it installs all the libraries specified in the pyproject.toml (and poetry.lock). poetry install is the equivalent to pip install -r requirements.txt
To install the libraries for our production environment, run
$ poetry install --without testThis will omit the test group.
Finally, if you want to run a Python script (or any other tool within your Poetry project), just add poetry run before your command:
/testproject $ poetry run python app.py

/testproject $ poetry run pytest tests
That’s it. Of course, Poetry has some more powerful features but for the beginning, knowing the basic workflow will help you in your Python projects.
Conclusion
I hope you see why using Poetry and Pyenv gives you such a boost over plain pip and the official Python installer from the web. While I didn’t solve Python’s never-ending discussion over tools, you can see how those two tools make your life easier.
great tutorial! I had to install using pipx (pipx install poetry) .. I think it's the recommended way now
Thank you for your tuto! Very helpful. Do you know if it's working on Apple silicons?